ArtsAutosBooksBusinessEducationEntertainmentFamilyFashionFoodGamesGenderHealthHolidaysHomeHubPagesPersonal FinancePetsPoliticsReligionSportsTechnologyTravel

How to Make A Happy New Year Pop-Up Card

Updated on April 4, 2017

It is almost the New Year, and I hope this one is better than the last one! I have decided to start off the New Year by finally finishing a pop-up card I was going to make for Christmas, but which I did not complete on time. When it comes to crafting there are certain projects that I put off doing, but I usually get back to these later. Since I have so many interests, such as reading, writing, current events, I notice my crafting takes a back seat. I also notice just reading hubs and commenting hubs takes up lots of time, so it is hard to get back into the crafting. Honestly, I want to craft and draw more, but I have just so many interests pulling me in different directions, so often it is hard to focus on just one thing. I decided to make a card because the store bought ones are just not my cup of tea. Personally, I prefer to draw out pictures as opposed to printing out a picture, but this time around I decided to use a photography of recent snowfall in the San Bernardino Mountains.

Step One: Create The Pop-Up
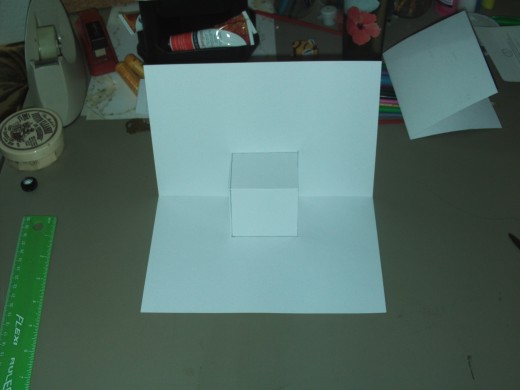
Create a pop-up in the middle of the cardstock.

The first thing you need to do is use a ruler to create the pop-up in the center of the card. If you want to see more in depth instruction on how to create the pop-up, then take a look at this other pop-up card I created for my friend's birthday. 

Step Two: Select The Picture

Here is the snowy picture I selected for my pop-up card.  The snowy sequoia tree made for the perfect image.
Here is the snowy picture I selected for my pop-up card. The snowy sequoia tree made for the perfect image.

The fun begins with selecting a picture for the pop-up card, so I decided to choose this scene of the lovely snow capped trees in the San Bernardino Mountains.

Step Four: Print Out The Picture
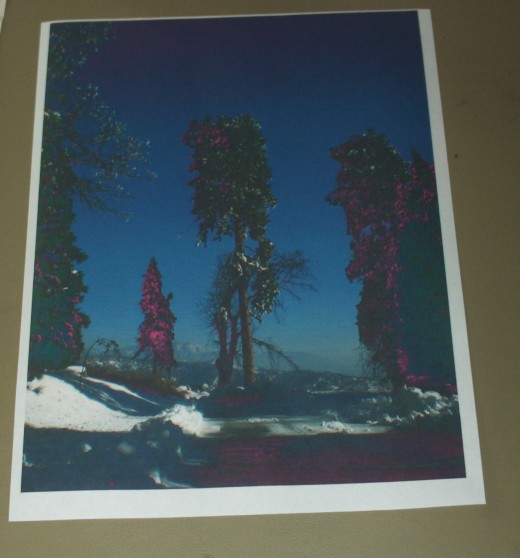
Print out the picture for the card.

The picture printed out a little funny as I was running low on ink at the time.  Nonetheless, I actually like the fuchsia tinting on the trees, and it gives this picture an ethereal effect.

Step Five: Cut Out The Pop-Up
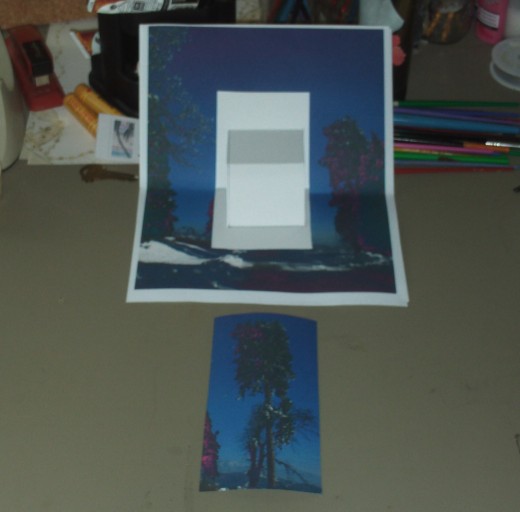
Plan out what the card will look like before gluing anything to the card stock.

Plan out which object you would like to pop-out on the card.  For this picture I decided to make the large sequoia tree the focal point, so I cut it out and laid it on the card stock to see if this would work.

Step Six: Make Sure Everything Looks Good Before Appling Mod Podge
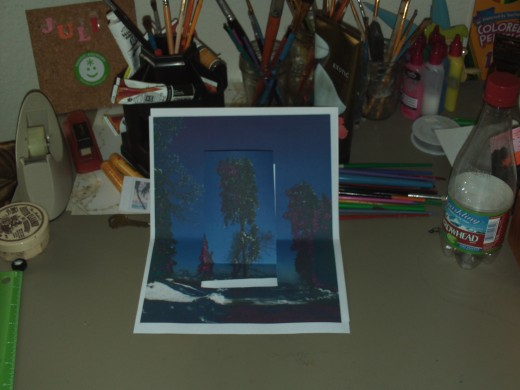
Lay the picture on top of the card stock and make sure the pop-up, and the back ground will look good before gluing anything down.

Before applying glue I like to make sure the pop-up and the background will align on the card.  The next step will be to secure everything in place.

Step Seven: Apply Mod Podge To The Back of The Picture
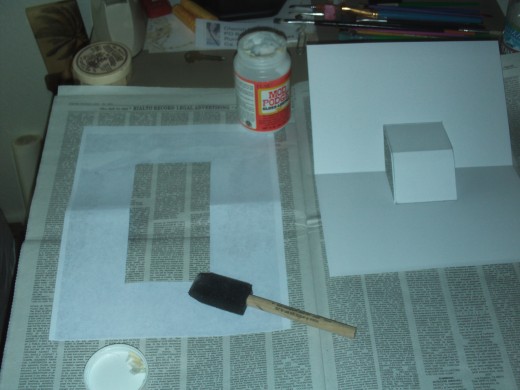
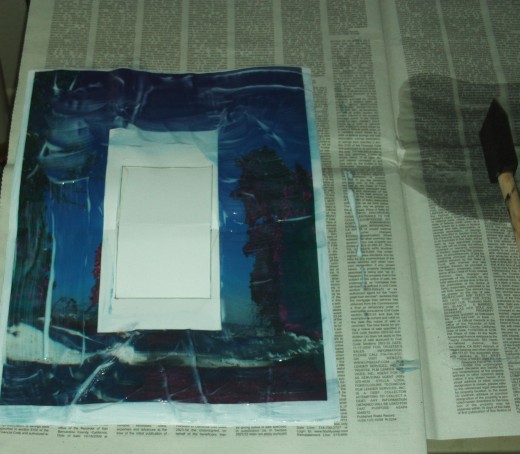
Here I used a craft sponge to apply mod podge to the back of the picture.

After swiping mod podge on the back of the picture I decided to secure it to the card stock. 

Step Eight: Paint Mod Podge Over The Picture

Click thumbnail to view full-size
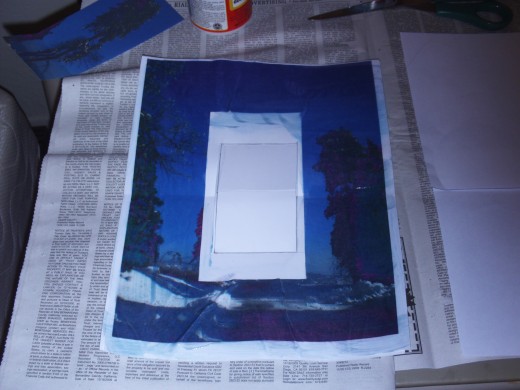
Here I used a paint mod podge over the picture.Here is what the card looks like once the mod podge has dried on the picture.
Here I used a paint mod podge over the picture.
Here is what the card looks like once the mod podge has dried on the picture.

In this step I painted the mod podge on the card stock to give the card and lustrous painted effect.  I have not really heard of tons of people doing this, but I love the painted and shiny look that mod podge lends to any drawing.  The wonderful thing about mod podge is that it also makes a photograph look more like a painting, which is especially the case with this surreal qualities of this print out.

Step Nine: Glue On The Pop-Up Image
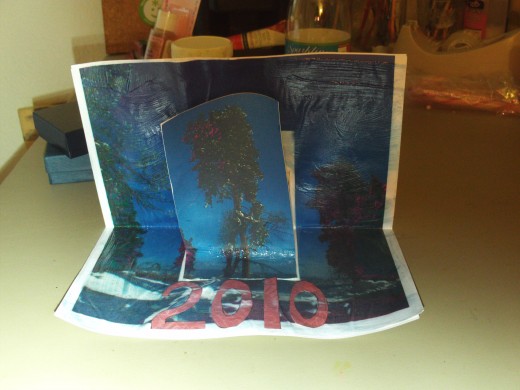
Add the sequoia image to the pop-up portion of the card.

The sequoia tree was added to the pop-up portion of the card, which gives it its three dimensional like effect. I still prefer the way a drawing looks on a card, but gluing down a picture is a good alternative for those who do not like to sketch.  Next, I sketched out and cut out the year 2010, which I glued underneath the tree.  This is a Happy New Years 2010 greeting card after all!

Step Ten: Add The "Happy" To the Front of The Card
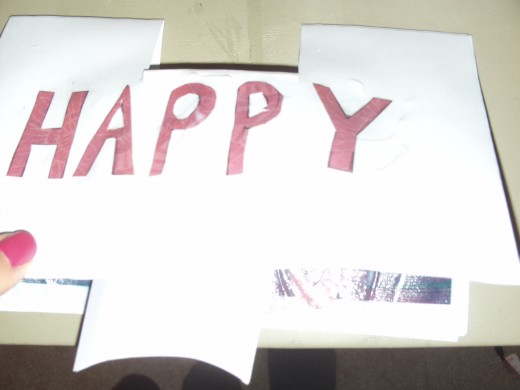
Here I sketched out the word happy on pink paper and cut it out.  Next, I glued it to the front of the card.
Here I sketched out the word happy on pink paper and cut it out. Next, I glued it to the front of the card.

Now I am adding the word happy to the card, which will go on the front before opening it.  I did not cover up the hole where the pop-up is, but I just wanted to keep this card simple.

The Finished New Years 2010 Pop-Up Card

working

This website uses cookies

As a user in the EEA, your approval is needed on a few things. To provide a better website experience, hubpages.com uses cookies (and other similar technologies) and may collect, process, and share personal data. Please choose which areas of our service you consent to our doing so.

For more information on managing or withdrawing consents and how we handle data, visit our Privacy Policy at: https://corp.maven.io/privacy-policy

Show Details
Necessary
HubPages Device IDThis is used to identify particular browsers or devices when the access the service, and is used for security reasons.
LoginThis is necessary to sign in to the HubPages Service.
Google RecaptchaThis is used to prevent bots and spam. (Privacy Policy)
AkismetThis is used to detect comment spam. (Privacy Policy)
HubPages Google AnalyticsThis is used to provide data on traffic to our website, all personally identifyable data is anonymized. (Privacy Policy)
HubPages Traffic PixelThis is used to collect data on traffic to articles and other pages on our site. Unless you are signed in to a HubPages account, all personally identifiable information is anonymized.
Amazon Web ServicesThis is a cloud services platform that we used to host our service. (Privacy Policy)
CloudflareThis is a cloud CDN service that we use to efficiently deliver files required for our service to operate such as javascript, cascading style sheets, images, and videos. (Privacy Policy)
Google Hosted LibrariesJavascript software libraries such as jQuery are loaded at endpoints on the googleapis.com or gstatic.com domains, for performance and efficiency reasons. (Privacy Policy)
Features
Google Custom SearchThis is feature allows you to search the site. (Privacy Policy)
Google MapsSome articles have Google Maps embedded in them. (Privacy Policy)
Google ChartsThis is used to display charts and graphs on articles and the author center. (Privacy Policy)
Google AdSense Host APIThis service allows you to sign up for or associate a Google AdSense account with HubPages, so that you can earn money from ads on your articles. No data is shared unless you engage with this feature. (Privacy Policy)
Google YouTubeSome articles have YouTube videos embedded in them. (Privacy Policy)
VimeoSome articles have Vimeo videos embedded in them. (Privacy Policy)
PaypalThis is used for a registered author who enrolls in the HubPages Earnings program and requests to be paid via PayPal. No data is shared with Paypal unless you engage with this feature. (Privacy Policy)
Facebook LoginYou can use this to streamline signing up for, or signing in to your Hubpages account. No data is shared with Facebook unless you engage with this feature. (Privacy Policy)
MavenThis supports the Maven widget and search functionality. (Privacy Policy)
Marketing
Google AdSenseThis is an ad network. (Privacy Policy)
Google DoubleClickGoogle provides ad serving technology and runs an ad network. (Privacy Policy)
Index ExchangeThis is an ad network. (Privacy Policy)
SovrnThis is an ad network. (Privacy Policy)
Facebook AdsThis is an ad network. (Privacy Policy)
Amazon Unified Ad MarketplaceThis is an ad network. (Privacy Policy)
AppNexusThis is an ad network. (Privacy Policy)
OpenxThis is an ad network. (Privacy Policy)
Rubicon ProjectThis is an ad network. (Privacy Policy)
TripleLiftThis is an ad network. (Privacy Policy)
Say MediaWe partner with Say Media to deliver ad campaigns on our sites. (Privacy Policy)
Remarketing PixelsWe may use remarketing pixels from advertising networks such as Google AdWords, Bing Ads, and Facebook in order to advertise the HubPages Service to people that have visited our sites.
Conversion Tracking PixelsWe may use conversion tracking pixels from advertising networks such as Google AdWords, Bing Ads, and Facebook in order to identify when an advertisement has successfully resulted in the desired action, such as signing up for the HubPages Service or publishing an article on the HubPages Service.
Statistics
Author Google AnalyticsThis is used to provide traffic data and reports to the authors of articles on the HubPages Service. (Privacy Policy)
ComscoreComScore is a media measurement and analytics company providing marketing data and analytics to enterprises, media and advertising agencies, and publishers. Non-consent will result in ComScore only processing obfuscated personal data. (Privacy Policy)
Amazon Tracking PixelSome articles display amazon products as part of the Amazon Affiliate program, this pixel provides traffic statistics for those products (Privacy Policy)
ClickscoThis is a data management platform studying reader behavior (Privacy Policy)