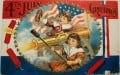
How To Make A Flag Magnet For The Fourth of July

The Fourth of July is a patriotic holiday for making red, white, and blue themed arts and crafts to express our national spirit. One of my hobbies is making my own magnets, so I decided to make a cross stitch American flag, which has thirteen red and white stripes, and a blue canton with fifty white stars. The stripes stand for the original thirteen colonies, and the fifty stars stand for the current fifty states. Each time a new state was admitted to the union a new star was added to the flag, which means the last time two stars were added was back in 1959 for Alaska and Hawaii. My cross stitch magnet only has forty-eight stars, but I ran out of room and was not able to add all fifty. If you want to be very precise you can measure out the stitches on the plastic mesh in advance, but I decided to just work with a rectangular scrap that I had left over from another project, which means I was not able to add all fifty stars. To me it is fun to simply capture the essence of the flag, and a few times I have even drawn fun pictures of Old Glory with just a few stars in the canton. Cross stitching is a project you can work on while visiting with friends, or just watching TV, which makes it perfect because it does not require too much attention. The supplies that I used for this project consist of:
- plastic canvas mesh
- a large eyed needle for cross stitching with yarn
- red yarn
- blue yarn
- white yarn
- a black marker
- scissors
- a ruler

Step One: Cut Out The Flag Shape

Use a black marker to draw out the shape of Old Glory. For this project I used a ruler to draw precise lines for cutting. Next, take the scissors and make sure to cut carefully alone the lines. Use a rule to draw the stripes, canton, and stars. Once you have drawn out the flag it is time to start cross stitching.
Step Two: Begin Cross Stitching The Canton

Start by cross stiching the blue yarn on to the canton of the flag. First take the scissor and cut off enough yarn to cross stich a few rows. Secure the yarn to the plastic mesh by sewing over a small portion of the thread at the bottom.
Step Three: Continue Cross Stiching The Canton
Click thumbnail to view full-size


Keep cross stitching the blue yarn on to the canton portion of the flag. One of my favorite things to do is watch my own cross stitch work take shape, so take a gander at the slide show above to see the progress.
Step Four: Begin Adding The Stars

I made small cross shaped stitches to create the stars on the canton of my flag. What I did was make a right half stitch and then come back around to make a left half stitch.
Step Five: Keep Adding The Stars
Click thumbnail to view full-size


Keep adding the cross shaped stitches that will stand in for the stars on Old Glory. From a distance these actually look like real stars, but my canton only could fit forty-eight. Count out the stars precisely if you want to fit in all fifty on your flag. My flag is going to be a World War II themed Fourth of July magnet since I could only fit in forty-eight stars, which will remind me of how both my grandpas were stationed in Hawaii and the Pacific during the conflict.
Step Six: Start Adding The White Stripes

Start adding the white stripes to the flag following the outlines of the permanent marker drawing. For this project I cross stitched two rows of white yarn for each stripe, which add up to a total of six.
Step Seven: Keep Adding The White Stripes
Click thumbnail to view full-size


Keep stitching the white stripes to the flag until all six have been added. Personally I love the way the flag looks with just the blue and white, but we need to add the red for the finishing touch!
Step Eight: Start Adding The Red Stripes

Each red stripe will consist of two rows of cross stitching, which add up to seven horizontal lines in all.
Step Nine: Continue Stitching The Red Stripes
Click thumbnail to view full-size


Step Ten: Add The Magnets

Use scissors to cut off four small adhesive magnets and place the sticky side on the back of the flag. However, I found that I also need to add a little bit of glue because the sticky magnets do not always adhere to yarn. Allow your magnet to dry and soon it will be ready to use. Make several American flag mangnets and have fun decorating for the Fourth of July!