How To Make A Faux Obsidian Bracelet

Obsidian is a dazzling stone that glistens in the sun. For years I thought it would be amazing to own an obsidian bracelet, but then I realized I could make a faux one with some acrylic beads in my crafting supplies. I might as well use up my crafting supplies, or that is how I approach things, anyway. Obsidian rock is quite an awe inspiring to spot in nature, and I first remember finding an obsidian rock near an old mining cave where we used to camp back when I was young. I have always loved obsidian, but buying a large number of these beads would be more expensive than using acrylic ones I already have on hand. A large package of acrylic beads that look like obsidian sells for around a dollar, which is a great alternative for making a faux black obsidian bracelet. The materials I used for this project were:
- a ruler
- stretchy cord
- black acrylic beads
- scissors
I made five small black acrylic bracelets that I wear together, which gives the look of a more complicated bracelet. This project is easy enough for kids, but adults will also enjoy wearing these beautiful black colored bracelets.

Step One: Gather The Supplies

The first step is to gather together the beads and the stretchy cord for this project. Use a ruler to measure and cut off about twelve inches (30.48 centimeters). For my wrist I only need about seven to eight inches to go around, but I use the extra stretchy cord for tying off the bracelet.
Step Two: Add The First Bead

Tie a knot at the end of the stretchy cord and add the first bead. Make sure the knot is large enough so the bead does not slip off.
Step Three: Keep Adding Beads

Keep adding beads to the necklace. Make sure the slipknot is big enough so the beads do not fall off.
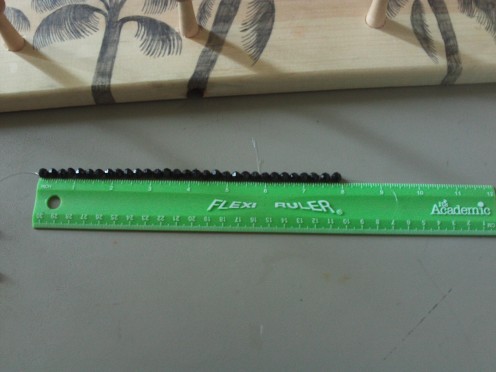
Step Four: Add More Beads

Add more beads to the bracelet. Straighten out the strand every now and then to measure with a ruler, which helps to check the progress. A bracelet has to be about 7.5 inches (19.05 centimeters) to go around my wrist, so I periodically measure the strand to see what stage I am at. I used a flexible ruler to measure around my wrist, but cutting off a piece of yarn and measuring it with a ruler would also work. I like to measure out my bracelets because in the past these were either too small or too large when I did not do so.
Step Five: Add Even More Beads

Keep adding beadss to the strand, and periodically check to see if the desired length has been reached. Keep in mind each person's wrist will vary, so measure before beading!
Step Six: Keep Adding Those Beads

Keep adding the beads to the bracelet. Of course measure from time to time.
Step Seven: Measure Before Tying Off Bracelet
After measuring my wrist I have determined a bracelet needs to be between 7.5 to 8 inches ( 19.05 to 20.32 centimeters) to go around my wrist. As I suggested please do measure your wrist to determine the proper circumference. Once my bracelet is long enough it is time to tie it off. I can do this easily by take both end and knotting these together several times until the bracelet is secure. I simply trim off the excess stretchy cord hanging out of the knot, which is not very visible since I used clear colored cord.
Step Eight: Make Four More Bracelets

For this project I decided to make five bracelets to be worn together, which creates the illusion of a more complicated bracelet.
Step Nine: Wear The Bracelets

The bracelets are now ready to wear and enjoy. These black acrylic beads have the look of faux black obsidian, so these are fun and economical alternative in the world or beading. Happy crafting!


